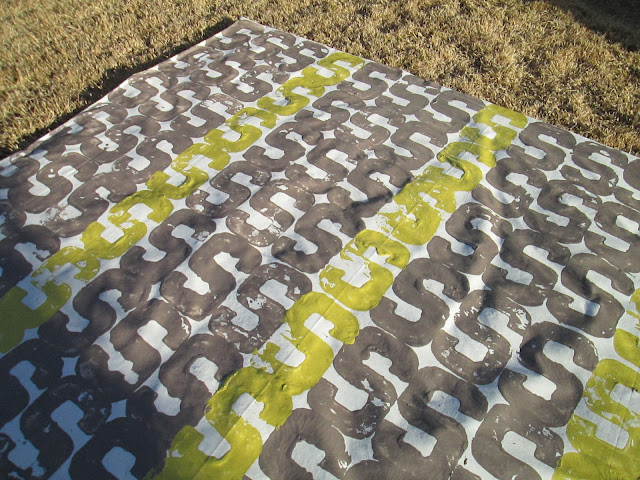
With two large dogs and a very rainy winter, mud has been a constant in our kitchen lately. The rug I currently had under my kitchen island was a cheap, neutral Ikea special. I liked it, but it was always in dire need of a wash. It's not really meant to be washed, so it was also falling apart. Now I either needed to buy a new rug which would ultimately come to ruin, or come up with another solution. Enter the fabulous stamped floorcloth. It has been treated with polyurethane and doused with Scotchguard. If all goes well, I should be able to just hose those muddy paw prints right off. Here's how I did it...
My original plan was to head to Big Lots for a canvas painter's dropcloth, which usually costs around $10. Not bad at all. Lucky for me, I decided to drop by St. Vincent DePaul Thrift Store on the way. I happened upon this piece of lavender canvas for $6. Nice! I measured the current kitchen rug, cut it to the size I needed, then hemmed the edges with my sewing machine.
I then washed it in the washing machine with hot water and put it the dryer. This made sure to remove any sizing that might inhibit the paint from sticking. After that, I ironed it very well. Any major wrinkles will only be magnified by the paint. Much like an old lady wearing too much makeup. I laid the pressed canvas out in my yard and painted both sides with some old paint I had in the garage, letting the first side dry before flipping it over. This step takes tons of paint. I used almost 3/4 of a gallon. I let the whole shebang dry overnight. This primed the canvas for the fun part.
I had a hard time making up my mind about the pattern on the floorcloth. I knew I wanted to use the leftover paint from my kitchen walls, which are chocolate brown, but I also wanted the cloth to have a little pop of color. I'm really feeling chevron patterns right now, but I have a five month old baby. Hence, no time for detailed measuring and taping. This part had to be awesome but complete by the end of naptime. I searched my house for interesting things I might be able to use to stamp a pattern onto the rug. I finally settled on this cardboard "S" I had. "S" also happens to be the first letter of my last name, so yay! One of these can be had at your local craft or fabric store for next to nothing. You could totally use your monogram too, but I love the way the sideways "S" made a graphic squiggly pattern. An "M" or "W" would also look amazing.
I moved the project to my driveway so I'd have a level surface on which to work. To stamp the pattern, I simply dipped one side of the "S" in paint, letting the excess drip off as much as possible, then stamped it onto the primed floorcloth. You don't need to make the stamps perfect. The imperfections really only add to the overall pattern. At least that's what I kept telling myself when an "S" was splotchy! To leave space for the pop of color I wanted, I used a paper cutout of the "S" as a spacer, leaving those rows blank. You could also measure the space you need, but I figured this might be faster. I was living on borrowed naptime.
After I finished with the brown paint, I rinsed off the cardboard "S" as best I could. I used some more leftover paint for this step. If you are using two or more colors, you might be better off buying letters for each paint color, or tracing the letters and making your own stamps. The cardboard was beginning to get a little mushy towards the end. Still, as you can see, it worked out pretty well.
Here's the finished project! I let it dry overnight and then sprayed it down with polyurethane and treated it with Scotchguard. That was left to dry for several hours. A floorcloth can be more slippery than a traditional rug, so make sure to put one of those grippy rubber mats underneath to prevent accidents. Now I have a "rug" ready for those eight muddy paws.


No comments:
Post a Comment